Using React Native Templates to kick-start app development

Templates have the potential to save many hours at the beginning of a project and yet are only briefly touched upon in the React Native documentation. The configurations included in a template not only save time but can also serve as a way to formalize development patterns across different projects in your team.
In this blog post we'll look at the various ways React Native templates can be leveraged, as well as share how we utilize them in Hybrid Heroes' app development projects.
What are templates?
If you've ever used the command line to initialize a new React Native project, you've probably already seen templates in action. A template is a bare React Native project that acts as the starting point for you to expand upon. They serve as a scaffold, providing a pre-configured project setup that includes essential components, libraries, and project structure.
These templates are initialized via a CLI tool, usually Expo CLI or React Native CLI. If you initialize a new React Native project, a default project template is used. This means that even if you are not using a custom template, you are still receiving a basic template of sorts.
How do I use a custom template?
Templates can be specified by using the --template option of the CLI. In Expo, this involves selecting one of 5 different stock templates with varying degrees of complexity. You can read about these in the create-expo-app documentation here.
For non-Expo projects, you have a lot more flexibility. Anyone can make their own React Native template, and as long as it is hosted on a public Git repository, anyone can use it. For example, if you wanted to use the Hybrid Heroes template, you would include the Git repository link as the argument:npx react-native init MyApp --template https://gitlab.com/hybridheroes/opensource/react-native-template
Further customizations can be read about in the CLI documentation page, such as specifying which package manager you want to use.
How do I make my own React Native template?
A template can be made for any project that contains React code and depends on React Native. One could begin by forking the default template mentioned above, and then expanding upon it to add any desired functionality or dependencies.
Custom template project structure
In order to extend our template, we need to understand what we're working with. Let's take a look at the contents of a template project.
- scripts/
- template/
- package.json
- postInitScript.js
- README.md
- template.config.js- template/: This contains a React Native project and is the core of your template. It includes all of the files that will be copied over when you generate a new project.
- scripts/: This directory can include any shell or Node.js scripts you might want to run during the initialization of the project. This could include CLI user input question, or maybe a dependency update script. The options are endless and can accomodate many additional features and customizations
- package.json: Not to be confused with the project file of the same name (
template/package.json). This contains any dependencies needed for your project's initialization or scripts. - README.md: This again refers to the README of the template repo, rather than that of the project (
template/README.md). Should include any instructions for template usage.
Template configuration file
The configuration file template.config.js is another requirement needed in order for your template to be handled by the CLI. It contains a number of properties that dictate how it is processed during initialization.
module.exports = {
  placeholderName: 'ProjectName',
  titlePlaceholder: 'Project Display Name',
  templateDir: './template',
  postInitScript: './script.js',
};- placeholderName: This specifies the placeholder name used in your template's project files. It will be used to find placeholders and replace them with the name supplied in
npx react-native init. - titlePlaceholder: This specifies the placeholder display name used in your template's project files. Specifically in
values.xmlandInfo.plist. - templateDir: Allows for a custom directory for your
template/contents, should you want it elsewhere. - postInitScript: This specifies the root script, as mentioned above, to be run after the project is initialized and the dependencies are installed.
Hybrid Heroes template
At Hybrid Heroes we maintain an open-source template, hosted here on GitLab. We use it as the basis for all new React Native projects in order to save time and avoid mistakes at the beginning of a project's lifecycle. It also serves as a source of truth for certain best practices for linter rules and localization workflows. Let's go through what we've included in it so far.
General dependencies
We've included the latest versions of a bunch of dependencies we use in every project. We also include any additional setup steps required by these dependencies, which saves us time reproducing these in every new project. These dependencies include:
- @react-navigation + react-native-screens: Our navigation libraries of choice. We include
nativeandnative-stackpackages as these are guaranteed to be used in each project. - redux-persist + react-native-mmkv: Our state persistence method of choice.
- react-native-config: Used for environment variable handling.
- react-native-gesture-handler: Required as a
@react-navigationdependency but often used for custom gesture handling.
We tend to organize screens and components in a way that reflects the navigation structure of the app. This means that all components and assets in the scope of a given ???
State management
We generally will use Redux for some form of state management. In cases where we use other state management systems or backend-driven states, we generally end up using Redux for things such as theming or user settings.
We use @reduxjs/toolkit for a number of reasons, ranging from developer experience to app performance:
- The helper functions for initializing reducers and creating selectors help establish more consistent development patterns in projects. We also further encourage these patterns by including example reducers in the template.
- The inclusion of
reselectselector memoization improves app performance but also promotes modular selector design. - Type safety is much easier to include, given most helper functions can accommodate generic typing. Our template also ensures strongly typed versions of the
useSelectoranduseDispatchhooks.
For persistence, we use redux-persist with react-native-mmkv as the storage engine. We've found mmkv to be more performant and less error-prone than the alternatives.
Localization
The template already has the configurations and scripts used for our localization handling. This includes the dependencies react-intl and @formatjs/cli as well as extraction and compilation scripts included in the package.json. These scripts allow us to quickly prepare JSON file copies that require translation, as well as import the translated copy into the app.
Code style enforcement
As well as including the dependencies for a number of code style tools (eslint + prettier) we also include the configuration files for each of these. This ensures consistency between our projects and acts as a source of truth regarding certain code style practices in the company.
Commit hooks
We use husky and lint-staged to manage commit hooks, which ensure the aforementioned localization scripts and code quality tools are being run on each commit.
Common components
Another way we ensure consistency in coding patterns is by including a number of common components in the template. We haven't included many of these in order to avoid the template getting too specialized, but every app will utilize the AppIcon and AppText components. The structure of these has been iterated upon over several projects and is made to be easily extendable and type-secure.
Something we had yearned for and discussed in the past was a reusable, extendable toast message implementation. We would often find ourselves with cases that required briefly communicating something to the user, such as the internet dropping, or a non-blocking request failing.
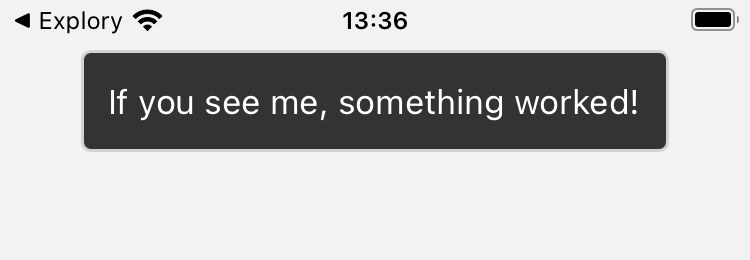
This led to us building a toast component, along with some handy context handling and hook interface, which allows for toast messages to be shown from any component or screen.
  const toast = useToast();

  const showToast = () => {
    toast.show('If you see me, something worked!', {
      type: ToastType.DEFAULT,
    });
  };
For maintainability reasons, we generally try to avoid using third-party component libraries when a custom-made solution is feasible. This approach reduces the risk of dependency on external updates or fixes, which can sometimes lead to unexpected issues or delays. Additionally, this approach allows us to tailor components precisely to our project's needs, rather than having portions of functionality not needed for the project.
Folder structure
At the beginning of this blog post we mentioned how using templates is a great way to establish development patterns from a project's get-go. For us, this starts with how the files and directories in a project are organized.
- src/
  - components/
  - hooks/
  - screens/
    - SampleScreenOne.tsx
    - SampleScreenTwo/
      - assets/
      - components/
      - index.tsx
  - store/
    - entitiesExample/
      - index.ts
      - types.ts
    - sliceExample/
      - index.ts
      - types.ts
  - styles/

- App.tsx
- AppNavigator.tsx- src/components/: This contains the most generic and reusable components that are relevant across the entire app, such as
AppTextandAppIcon. We use theAppprefix for these components to make it clear they are not specific to any screen or feature. - src/hooks/: Although we try to keep state and logic code coupled to their relevant folders, here we include any hooks that are used everywhere such as
useToast. - src/screens/: We try to group all remaining assets and components by the screens in which they are used. If a screen requires neither of these it can remain a single file.
- src/store/: This directory contains folders for each reducer in our Redux store. We give each slice a dedicated folder and try to keep all type declarations for a given reducer (such as entity interfaces) in said folder.
Organizing style declarations
At Hybrid Heroes we've been working closely with our design team to make the transition from Figma project to code repository as efficient and infallible as possible.
We have been utilizing Figma's design token system to refine our own design system. This not only ensures consistency in components but also standardizes specifications such as color tokens and spacing. Our template mirrors these in the src/styles/ directory and we even made our own Figma plugin to make exporting these variables even easier!
Continuous integration
Although app signing varies from project to project to some degree, there are a few common elements that are generally shared across our React Native projects.
Firstly, GitLab is our version control platform of choice. Not only is our template hosted here, but we use it for all of our company projects. For this reason, we include a .gitlab-ci.yml configuration file in the template, with the outlines for some basic testing and build pipelines to build upon.
We also utilize Fastlane to handle app signing and credential management. This usually involves several boilerplate configuration files and dependencies for iOS and Android, so we've sought to speed this up by already including these in the template.
Conclusion
Templates in React Native are a powerful tool for boosting productivity and ensuring consistency across projects. By creating and using custom templates, you can standardize your development process, reduce setup time, and help your team focus on building features rather than configuring projects.
We're continuously working on our template. Whether you're just getting started with React Native or you're looking to optimize your team's workflow, investing time in creating robust templates can pay off significantly in the long run.
If you're interested in trying out our template (or perhaps even contributing!) head over to the GitLab repo to check it out.
Interested in creating your own React Native App? Contact us here for a free first consultation!