Custom Fonts in React Native: How to get consistent results

There are many things to consider when designing for mobile. Fonts are one of them, and more often than not the design specifications will require the use of custom fonts in both Android and iOS builds. Let's have a look at how we can implement custom fonts in a React Native project and how to address the common issues that we might encounter. We will take the DIN Next Pro Rounded Bold font as an example.
Install the font
The first step towards integrating your font in your app is to create and add them inside a assets/fonts folder. Then it is necessary to tell React Native where to look for those fonts by adding the following to the package.json file and run react-native link.
"rnpm": {
    "assets": [
	"./assets/fonts/"
    ]
},
One thing to consider is that React Native will read the fonts from different references on iOS and Android. On iOS, the Family property will be considered.
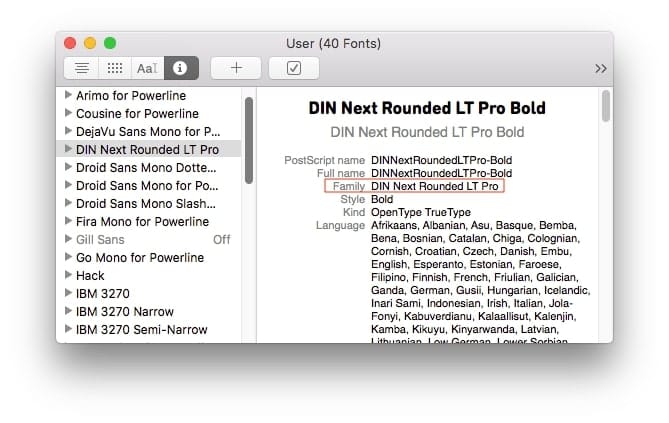
However, on Android, the file name holds the reference to the font. To ensure that we can specify our font-family the same way on both platforms, let us rename the file from DIN-Next-Rounded-LT-Pro.ttf to DIN Next Rounded LT Pro.ttf .
We can then specify our new font inside our App and admire the results.
customFont: {
    fontFamily: "DIN Next Rounded LT Pro",
    fontSize: 30
}
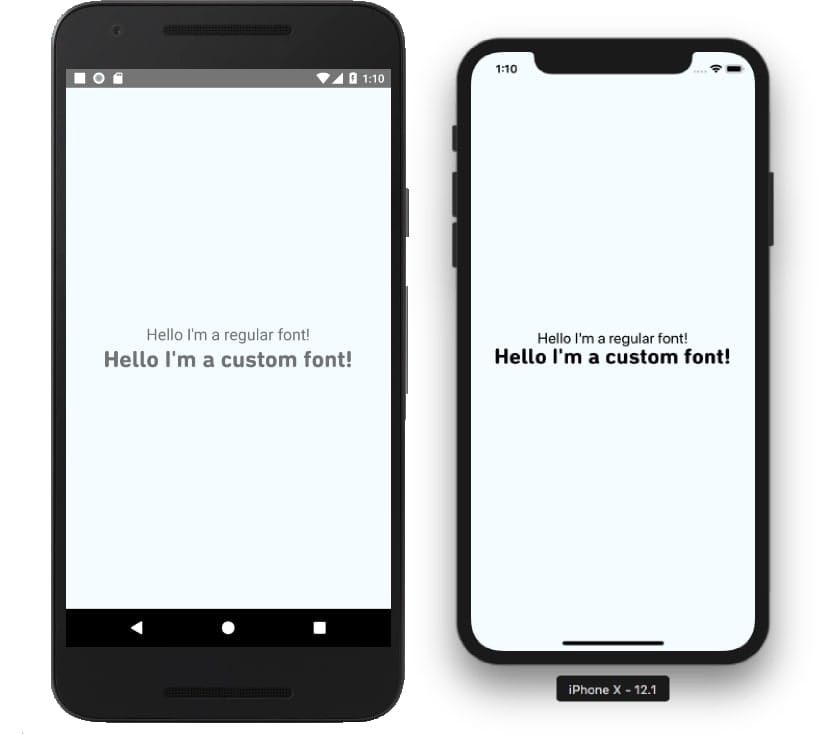
Looking good! 💅
Common issues
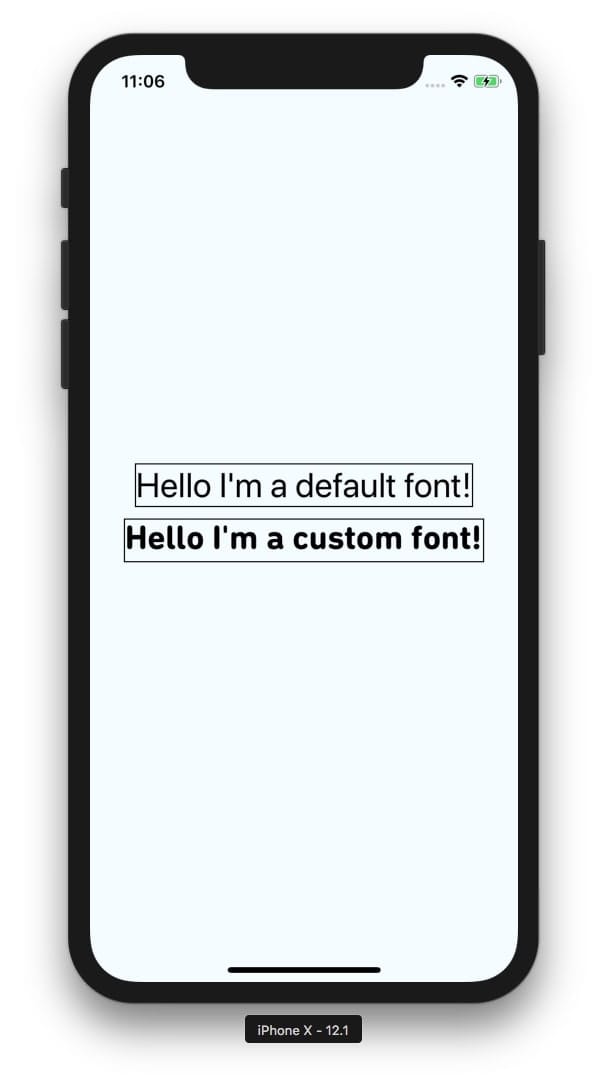
There is, however, an issue with this font that we cannot see at the moment. Let's try and add some borders around the fonts on iOS.

We can now see how the font is not aligned properly within its container compared to the system font. This issue happens with a lot of custom fonts that are not well optimized for iOS. The reason of this is that your custom font has ascender and descender settings which are not being rendered properly by iOS.
To fix this issue, we need to manually edit those. Let's download the Apple Font Suite and correct the values.
Navigate to the folder containing your files and run this command.
ftxdumperfuser -t hhea -A d DIN\ Next\ Rounded\ LT\ Pro.ttf
This will create a hhea.xml file that you can open your editor of choice.
- If the font sits too low you have to increase ascender and descender
- If the font sits too high you have to decrease ascender and descender
In our example, our font sits too high. After trying out a few different combinations, we find that we need to decrease both values from
ascender="850"
descender="-150"
to
ascender="750"
descender="-250"
After saving the file, we can run the following command to reconstruct a new font file:
ftxdumperfuser -t hhea -A f font.ttf
Let's move it to ./assets/fonts/, run react-native link and build our app again.
Our font is now fixed and sits in the middle of our container. We managed to fix the alignment and we are ready to use our custom font in our app.
Conveying a specific user experience with the help of custom fonts can make a huge difference on the quality of your app, and it has never been easier to implement one in a React Native project.
If you want to read more about development with React Native, check out this blog post about implementing inline icons: b5x-stateful-inline-icon or this blog post about lock screen audio controls: React Native music control.