Create an animated splash screen for your React Native app with Lottie
If you have a React Native app and you wish to customize its splash screen, you are at the right place! We will introduce you to different ways to do so in this article, but first of all, let's clarify what the splash screen is.
What is a splash screen?
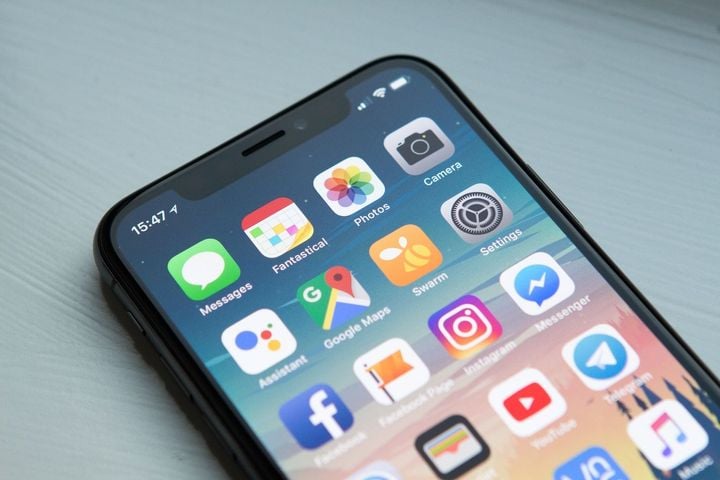
A Splash Screen is simply the first thing you will see when you start a closed app on your phone.
Default splash screen on Android
As you can see in the video above, we can see the app logo in the center of the screen before the app starts. It's quite brief by default, but we can change the entire splash screen with whatever we like, and also handle the duration of it!
On a React Native app, the splash screen is handled natively on iOS and Android. It is actually the best way to do it to have the most optimized result.
We wrote a complete article about it if you wish to change the splash screen of your application natively on iOS and Android.
In this article, we will talk about how to create an animated splash screen with Lottie.
Let's dive in!
How to create the animated splash screen
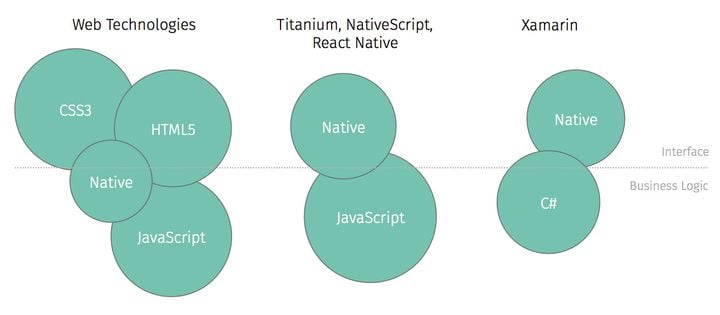
To stay in the cross-platform spirit of React Native, we will present you with a way to customize the splash screen of your application by using a component that will work for both iOS and Android!
We can transfer the whole splash screen logically from the native code to our JavaScript component and use the LottieFile library to render our animation.
It's a good solution if you are limited in time or by resources and want to have a cool animated splash screen. Indeed, the result can differ on both platforms, and it won't load as fast as the native one.
To create a custom splash screen, we will use a LottieFiles animation. LottieFiles are animation files optimized for your app. You will find a convertor on their website to translate your own animations in a Lottie format, or you can also use their editor to directly create your animation there. For this article, we are going to use the following LottieFile as an example.

Once you have saved your LottieFile animation, we are going to create a custom component. But first, we need to install the Lottie package for React Native:
npm install lottie-react-nativeInstall lottie-react-native with npm
Or if you're using yarn:
yarn add lottie-react-nativeInstall lottie-react-native with yarn
If you're using an iOS simulator, you also need to update the pods;
cd ios && pod installUpdate pods
Let's create a basic component to start with:
import React from 'react';
import LottieView from 'lottie-react-native';

export default function SplashScreen() {
  return (
    <LottieView
      source={require('./path/to/lottie/animation')}
      style={{ width: '100%', height: '100%' }}
      autoPlay
      loop
    />
  );
}
Basic SplashScreen component
Here we set up both properties autoPlay and loop to true, we could easily verify if our animation works by navigating to our component. You should be able to see your animation:
Lottie Animation Component
Ok good! Now, we want to display the animation once when we start the app and remove it when the animation is over. So, the process will be to import our SplashScreen component in the root file of our app, so the animation can be displayed. Then we need to detect the end of the animation so we can hide it and access the application content. LottieView component comes with a onAnimationFinish callback method, which will allow us to execute some code when the animation is over.
Let's first import our SplashScreen component in our App root file, and implement the condition;
import React, { FunctionComponent, useState } from 'react';
import SplashScreen from '../components/SplashScreen';

const Home: FunctionComponent = () => {

  const [animationCompleted, setAnimationComplete] = useState<Boolean>(false);

  return (
   <>
      {!animationCompleted ? (
        <SplashScreen />
      ) : (
        {/* ... Your App */}
      )
    </>
  )
}
App root
Here we create a local state in our file to check if we should display the splash screen or not. We initiate the animationCompleted to false, so when the app first starts, we show the splash screen.
Now we need the onAnimationFinish method of the LottieView in our SplashScreen component to update our animationCompleted state to true when the animation is over. For this, we need to pass a function able to do that to our SplashScreen component:
import React, { FunctionComponent, useState } from 'react';
import SplashScreen from '../components/SplashScreen';

const Home: FunctionComponent = () => {

  const [animationCompleted, setAnimationComplete] = useState<Boolean>(false);

  const changeAnimationStatus = (param: Boolean) => {
    setAnimationComplete(param);
  };

  return (
   <>
      {!animationCompleted ? (
        <SplashScreen onFinish={changeAnimationStatus} />
      ) : (
        {/* ... Your App */}
      )
    </>
  )
}
Render animation from the App root
And in the SplashScreen component:
import React, { FunctionComponent } from 'react';
import LottieView from 'lottie-react-native';

interface Props {
  onFinish: (param: Boolean) => void;
}

const SplashScreen: FunctionComponent<Props> = ({ onFinish }) => {
  return (
    <LottieView
      source={require('../assets/lottie-animation.json')}
      style={{ width: '100%', height: '100%' }}
      autoPlay
      loop={false}
      onAnimationFinish={() => onFinish(true)}
    />
  );
};

export default SplashScreen;
Complete SplashScreen component
This way our SplashScreen component can update the App root local state when the animation is over.
And that's it, our new splash screen is implemented!
Here is what the result looks like on Android:
Splash screen example Android
If you noticed, we still have the default Android splash screen. When we start the app, we first have the app logo appear, then we get our animation.
You can deactivate the native part by adding this line to your main > res > value > styles.xml file:
<item name="android:windowIsTranslucent">true</item>styles.xml
And here is the result on an iOS device:
Splash screen example iOS
When our app starts, we're showing the animation, and when the animation is done, we're accessing our app.
In our case here, this is the app we used to build a React Native application for a Shopify store. You can have a look at the article we wrote about it!
As you can see, even if both iOS and Android use the same custom component as a splash screen, it behaves differently depending on the platform. If you'd like to correct this, you can read about how to do it on the native side.