Customize the native splash screen (iOS & Android) of your React Native application

The splash screen is simply the first thing you see when you start an application. You might want to customize it to personalize the image of your brand. If that's the case, making it natively is the most optimized option you have.
Why choose to customize the splash screen natively?
If you're using React Native for your application, I assume that you already have an interest in building something cross platform. So, you can be wondering why we are not handling the splash screen of the application with a unique solution using React Native. It is possible to do so, we even wrote an article about it!
It can be a good solution if you're limited in time or by resources. But it will not be as optimised as doing it on the native side.
Indeed, you'll have better performances. The splash screen will be displayed as soon as the app launches, giving a smooth result. You will also benefit from a full native customizability with set of tools and options available in the native environments.
Another good point about customizing the splash screen on the native side, is that you can show platform specific splash screen. Depending on the OS, you can have a different splash screen for your application, which will give a more native result to your React Native application.
Now let's see how we need to process on both OS!
Customize the Android splash screen
On Android, by default the splash screen uses the App Icon. But you can replace it with anything that you want. For most applications, this would be enough already. We will still show you how to process if you need to customize it.
If you already have set up an app icon, you can use it for the splash screen. You can then skip the following steps on how to add a new Image.
But you can also choose to upload a separate image that you want to use for the splash screen.
If you do so, you can name it something like splash_screen_image.
In our example, as we didn't have an app icon setup already, we are using ic_launcher, which is the default name for the Android app icon. If you want to add a specific image for the splash screen, be cautious to choose a different name, or you will overwrite your app icon.
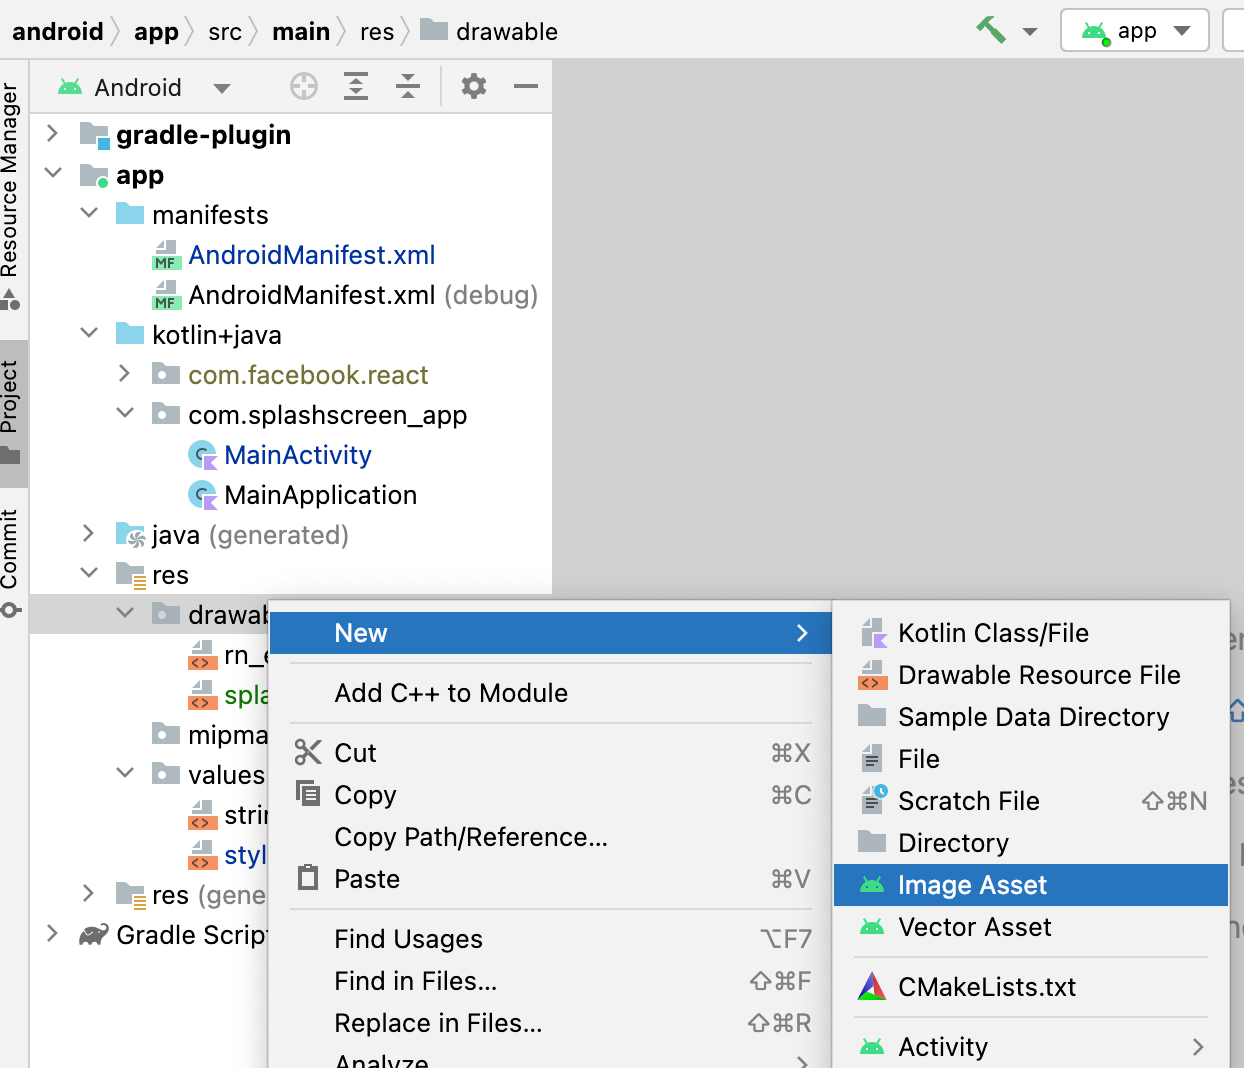
To upload an image, go to android > app > src > main > res and right click on drawable > New > Image Asset
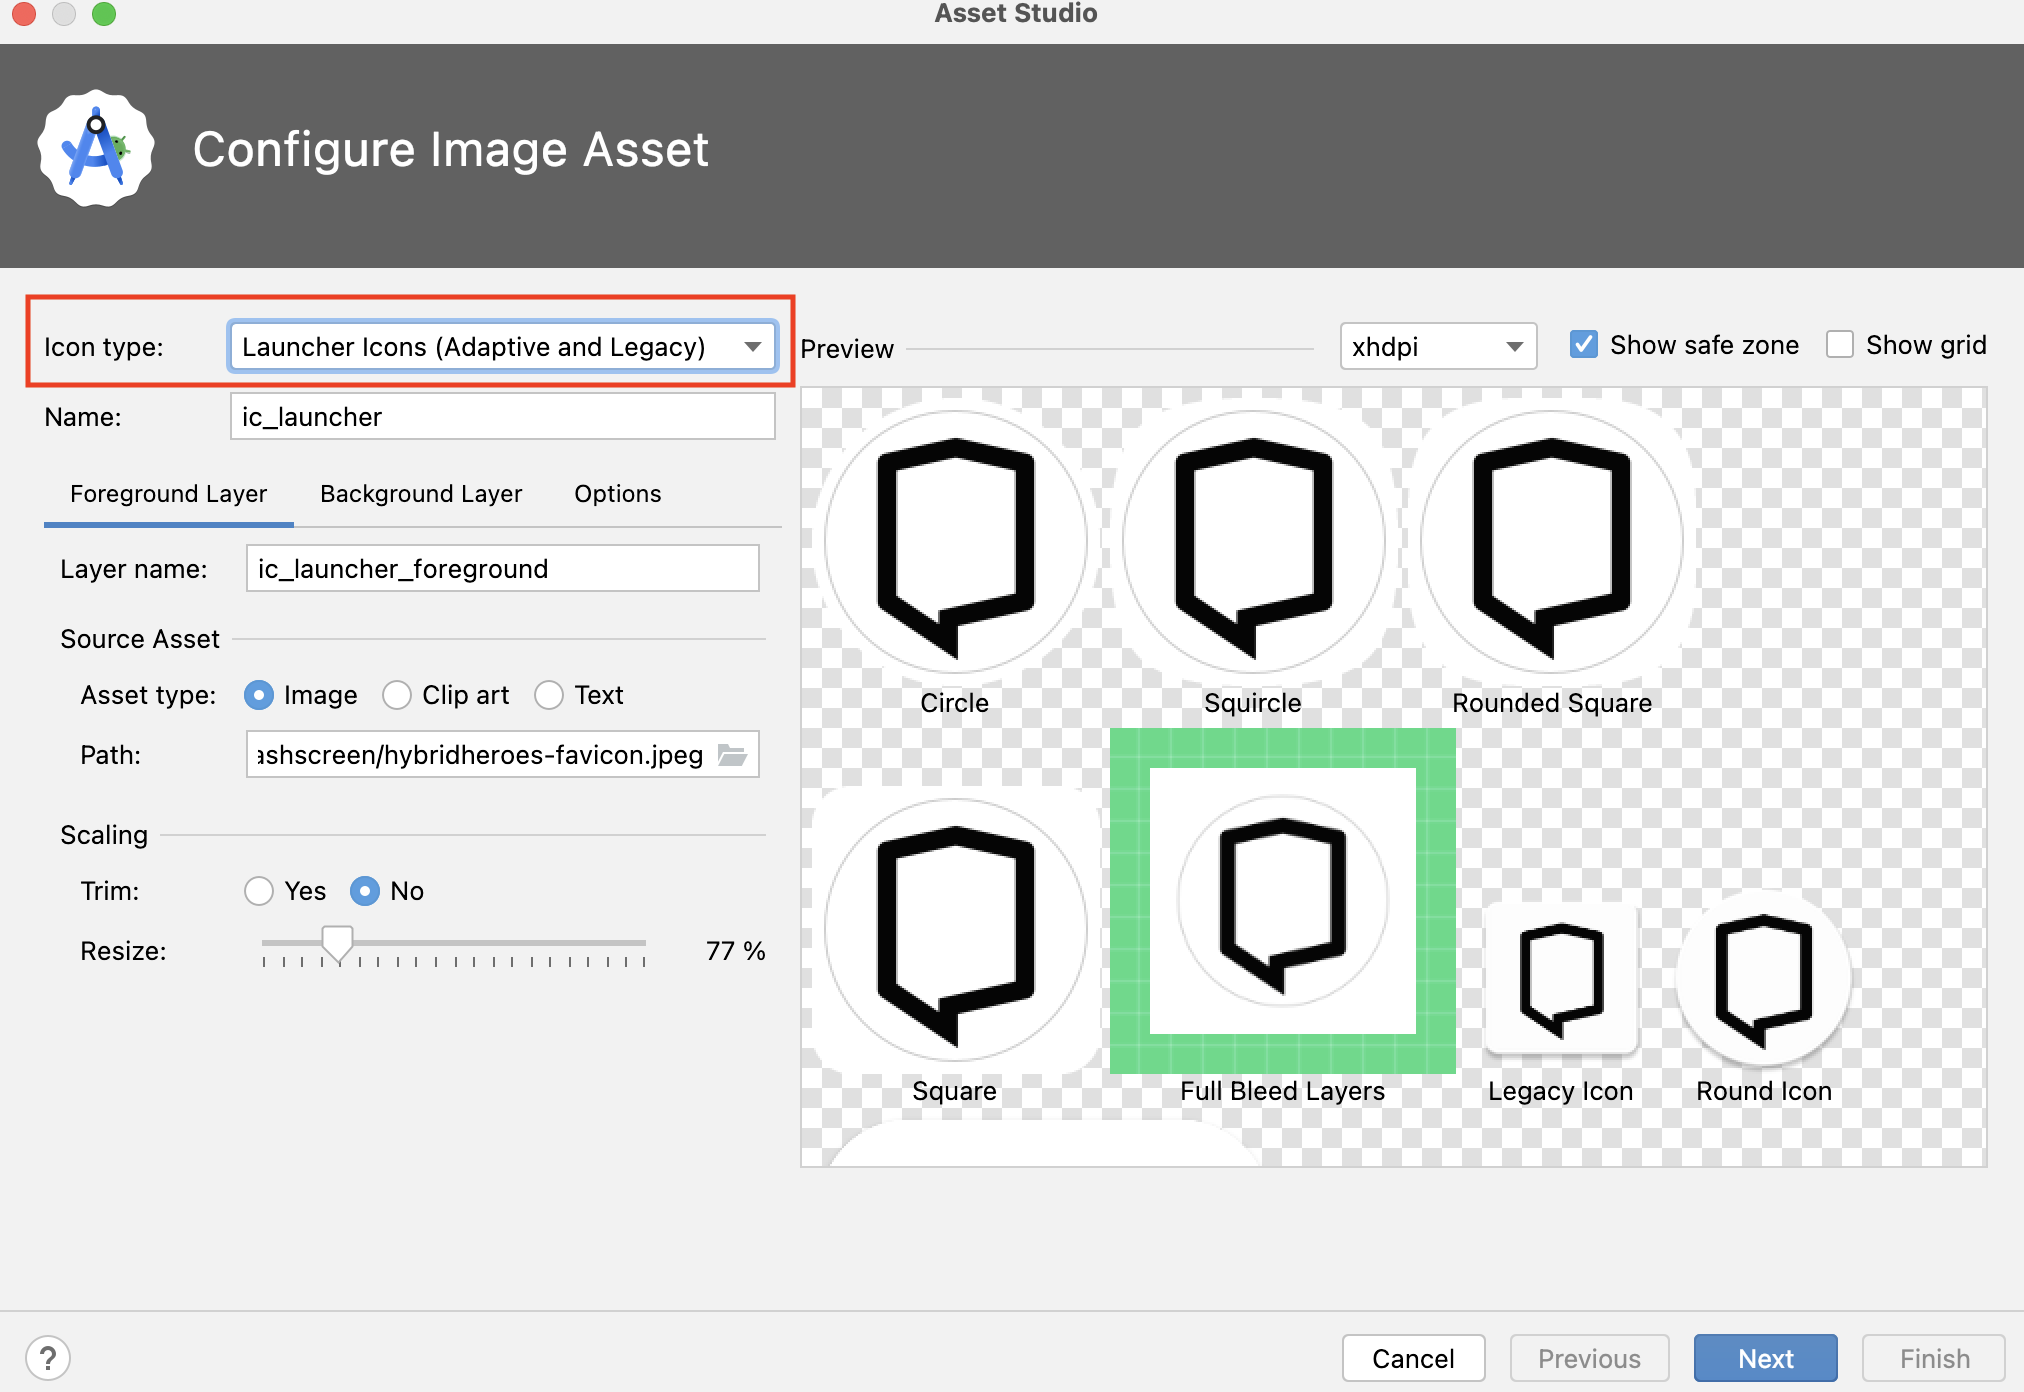
Then the configuration panel for Image Asset will open. You need to select Launcher Icon as the icon type. You can then resize it and click Next and Finish.
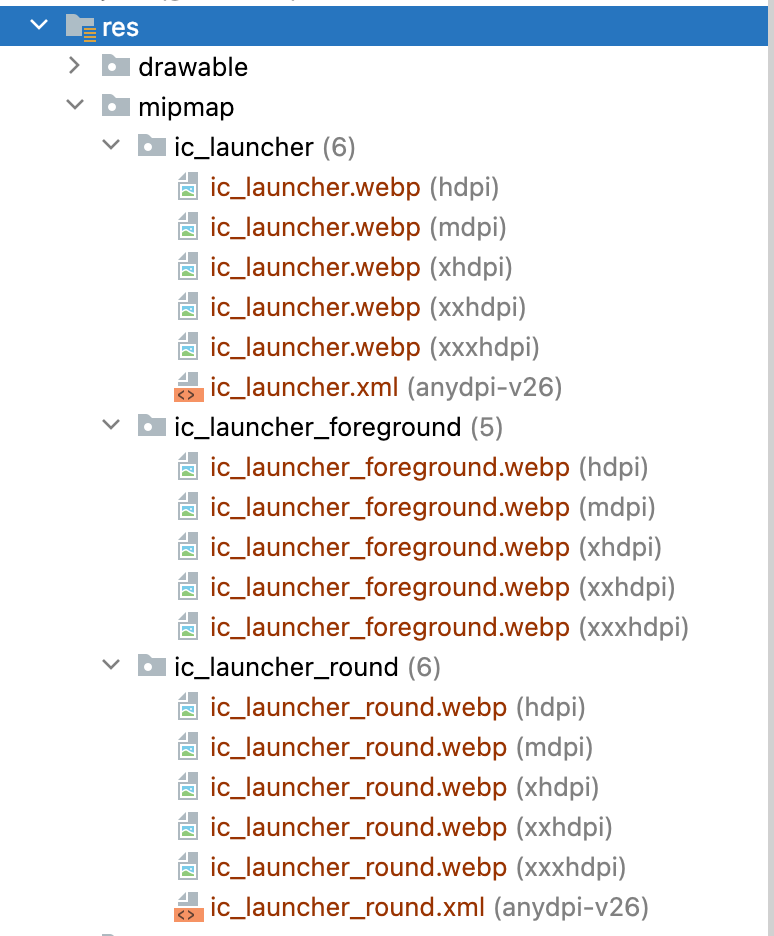
You should be able to see multiple files in your mipmap directory after that. That's what we are going to use as an icon for our splash screen.
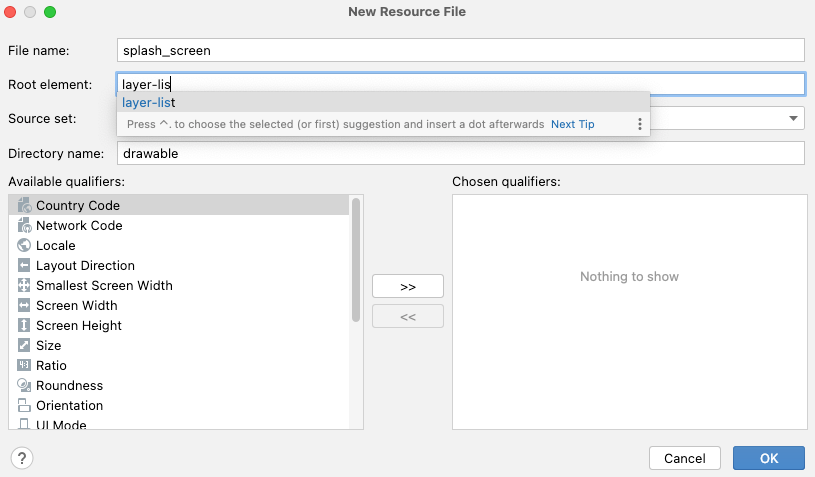
Now that we have our icon, we will create our splash screen. Right click again on the drawable directory, New, and this time select Drawable Resource File.
Name your file splash_screen, and replace in Root element selector by layer-list. Click Ok.
You can now open your splash_screen.xml in your drawable directory and use the following code:
<?xml version="1.0" encoding="utf-8"?>
<layer-list xmlns:android="http://schemas.android.com/apk/res/android">
    <item android:drawable="@android:color/white" />
    <item>
        <bitmap
            android:gravity="center"
            android:src="@mipmap/ic_launcher_foreground" />
    </item>
</layer-list>
splash_screen.xml
Here, we use the ic_launcher_foreground created in our mipmap folder whit a white background.
Then, go to the directory values (on the same level as the drawable one) and open the styles.xml file. We need to define our splash screen theme;
<resources>
    <!-- Base application theme. -->
    <style name="AppTheme" parent="Theme.AppCompat.DayNight.NoActionBar">
        <!-- Customize your theme here. -->
        <item name="android:editTextBackground">@drawable/rn_edit_text_material</item>
    </style>

    <!-- Splash screen theme -->
    <style name="SplashScreenTheme" parent="Theme.AppCompat.Light.NoActionBar">
        <item name="android:windowBackground">@drawable/splash_screen</item>
    </style>
</resources>
styles.xml
We use SplashScreenTheme as a name and select our splash_screen as an item. We now need to apply it to the AndroidManifest file by adding android: theme to activity:
<activity
        android:name=".MainActivity"
        android:label="@string/app_name"
        android:theme="@style/SplashScreenTheme"
  android:configChanges="keyboard|keyboardHidden|orientation|screenLayout|screenSize|smallestScreenSize|uiMode"
        android:launchMode="singleTask"
        android:windowSoftInputMode="adjustResize"
        android:exported="true">
        <intent-filter>
            <action android:name="android.intent.action.MAIN" />
            <category android:name="android.intent.category.LAUNCHER" />
        </intent-filter>
      </activity>
AndroidManifest.xml
Last step, we need to add the following code to our MainActivity file (use the correct code depending on the language of your MainActivity):
Java:
@Override
protected void onCreate(Bundle savedInstanceState) {
    setTheme(R.style.AppTheme);
    super.onCreate(savedInstanceState);
}
Java code for MainActivity.kt
Kotlin:
override fun onCreate(savedInstance: Bundle?) {
    // Call before `super.onCreate`
    setTheme(R.style.AppTheme)
    super.onCreate(savedInstance)
}
Kotlin code for MainActivity.kt
Our new splash screen is set up! You can rebuild your app and see the result.
There is still a last thing we can do; handling the background of the splash screen depending on the system theme. If you remember, in our splash_screen file, we just used a white background.
So first, we are going to create a colors.xml file in our res > values directory. This file will contain the color we are going to use for the light mode:
<?xml version="1.0" encoding="utf-8"?>
<resources>
    <color name="splash_background">#fff</color>
</resources>
colors.xml
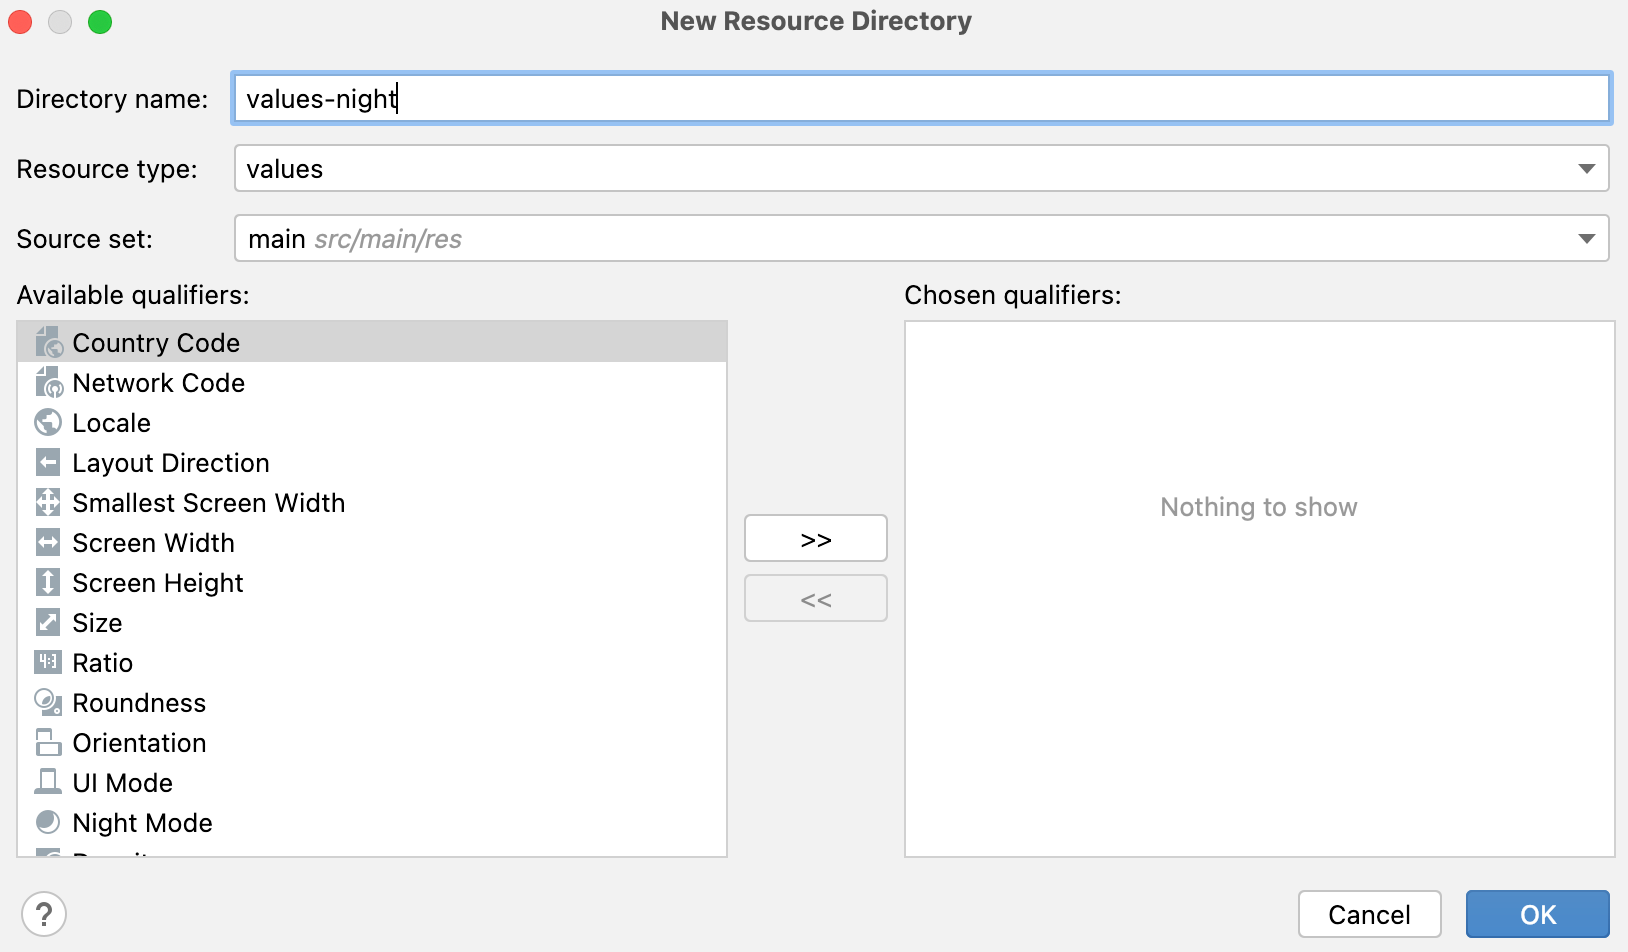
Now, besides the values repo, we need to create the values-night directory, and create inside a colors.xml file. Right click on the res directory, New > Android Resource Directory.
Here, the naming is important. The directory has to be values-night, as the -night key work will make Android understand that this is the directory we need to use if this is dark mode. Both of our colors.xml have the same name, and the color name inside as well, only the value change.
Then create the second colors.xml New > Resource File and give values-night as the directory name:
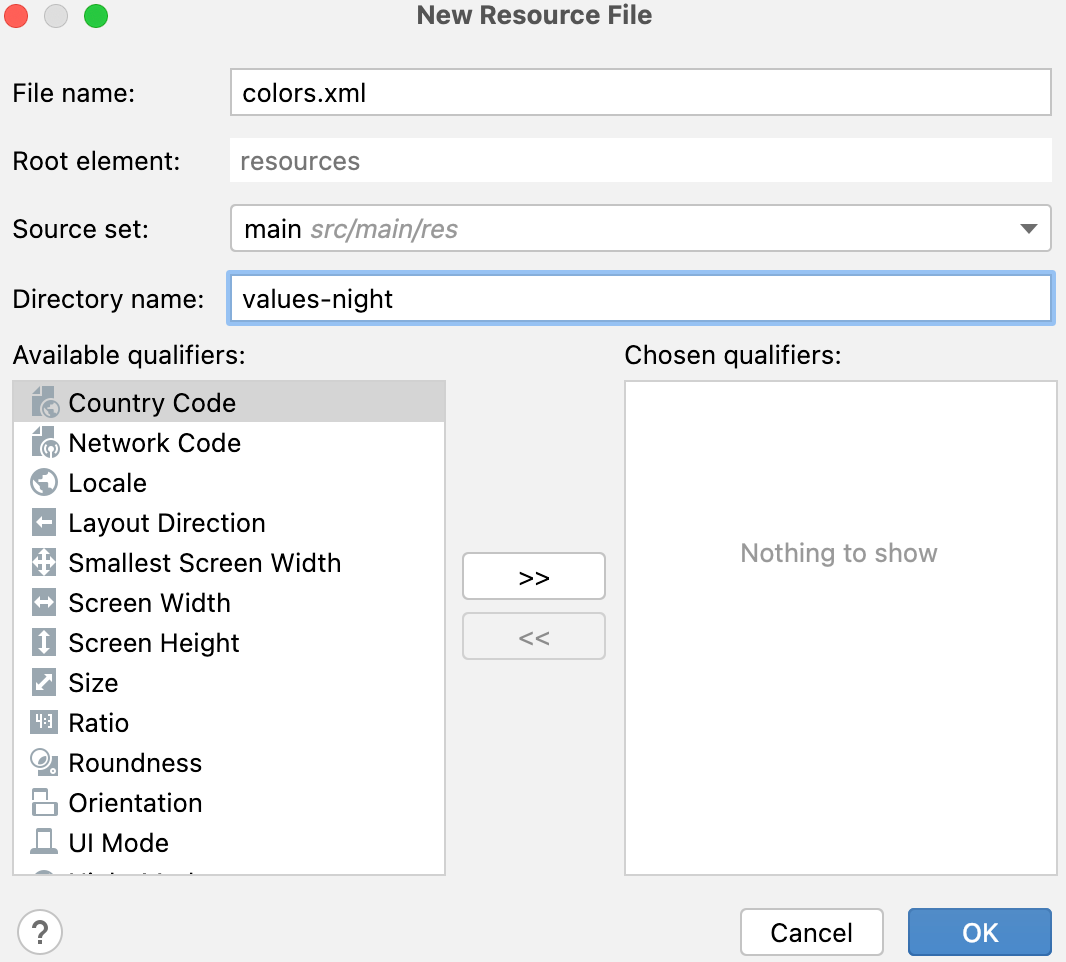
In this one, we will define a darker color for dark mode:
<?xml version="1.0" encoding="utf-8"?>
<resources>
    <color name="splash_background">#474747</color>
</resources>
colors.xml
So now, we can go back to our splash_screen file, and replace the white color we used before by our splash_background color, that will depend on the system theme:
<?xml version="1.0" encoding="utf-8"?>
<layer-list xmlns:android="http://schemas.android.com/apk/res/android">
    <item android:drawable="@color/splash_background" />
    <item>
        <bitmap
            android:gravity="center"
            android:src="@mipmap/ic_launcher_foreground" />
    </item>
</layer-list>
splash_screen.xml
Here is the result of our new splash screen, that matches the system theme:
Splash screen result on Android app
Customize the iOS splash screen
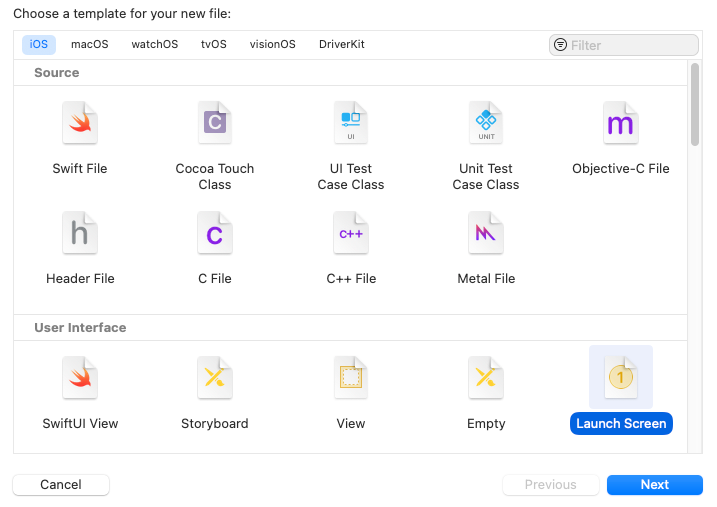
First, you need to open your React Native project with Xcode. By default, you should have under MyProjectName > ios > MyProjectName an element called LaunchScreen. If you don't, you can go to File > New > File. The below window will open. Select Lauch Screen and press next.
Here is what you should now have:
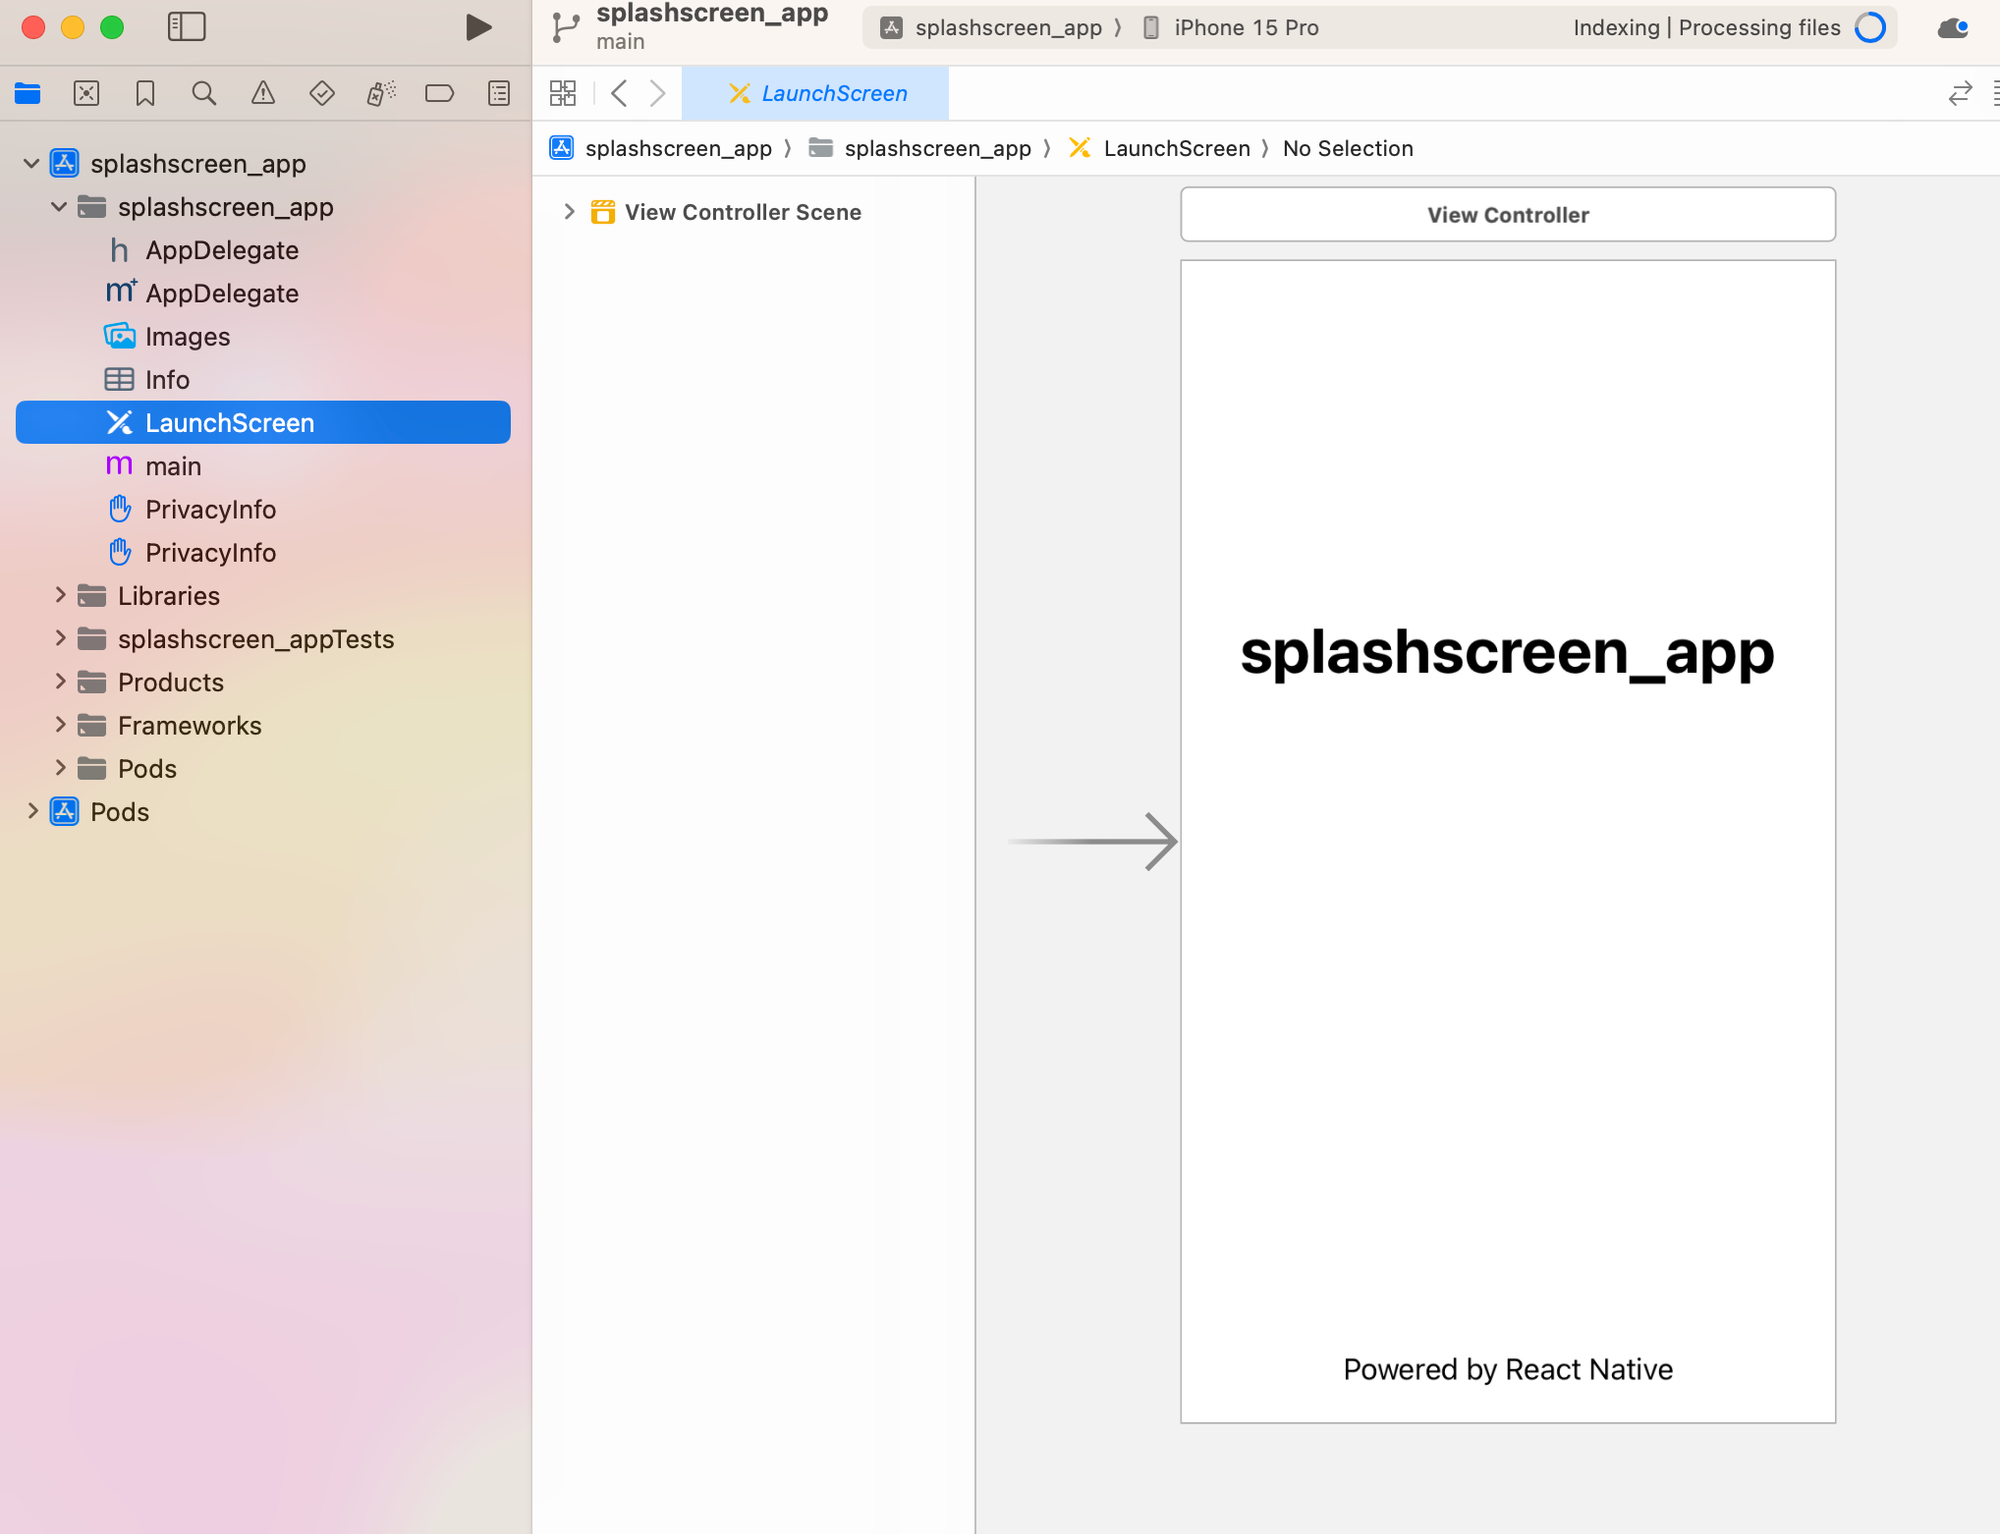
As you can see, for a React Native project the default iOS splash screen is the app name and the sentence Powered by React Native.
You can expand the View Controller Scene menu on the left and see the different layers that composed our splash screen.
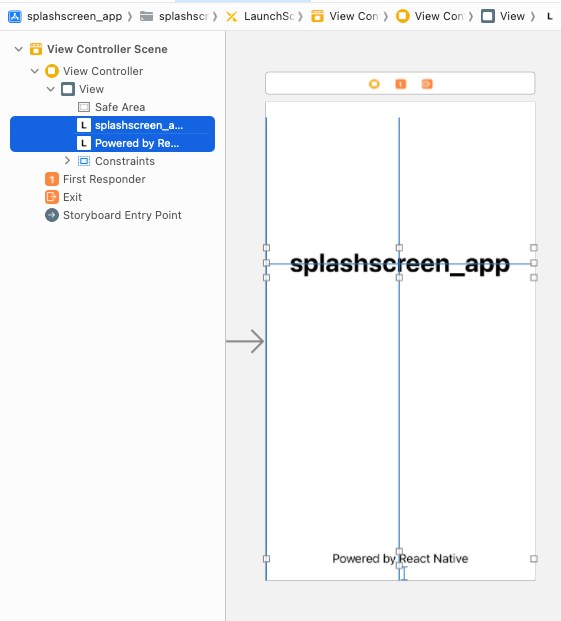
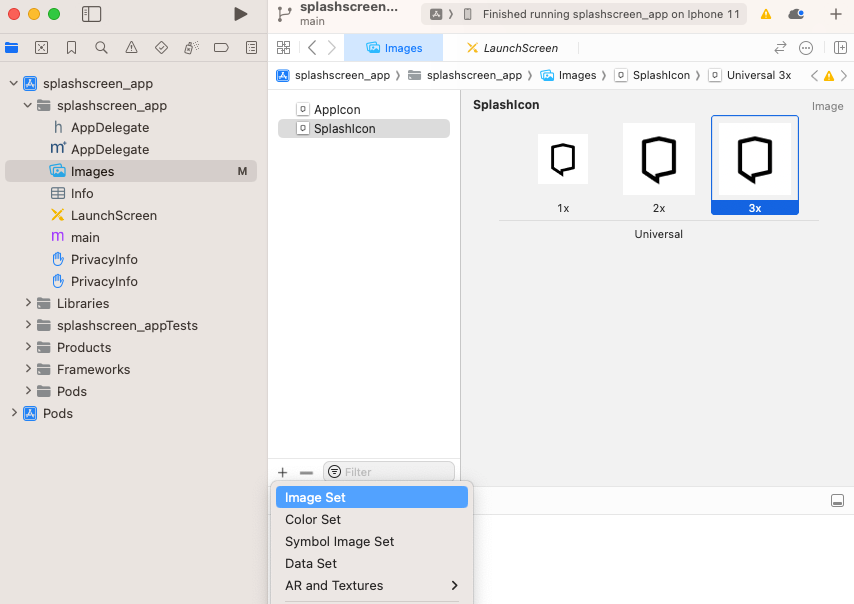
Here, you can delete both texts as we are going to use an image for our splash screen. Now let's add the image we want to use. For that, go to Image in your project directory, and click the + icon at the bottom and select Image Set.
You then need to have the image you want to use in 3 different formats, ideally 200x200 for 1x, 400x400 for 2x and 600x600 for 3x.
Now let's go back to LaunchScreen, where we will be adding our splash icon. To do so, click on the plus icon on the top right of Xcode, and find Image View to drag it into your View in the LaunchScreen

Then, select the Image View you just added to the View and use the splash icon we import before. You can do this in the right drawer:
Now we have our icon! You can freely move it around in the View, change its dimension etc...
Moving the icon around, you'll see blue lines that can help you center it vertically and horizontally. It's important to do it so your logo will always be centered no matter the device and its screen size.
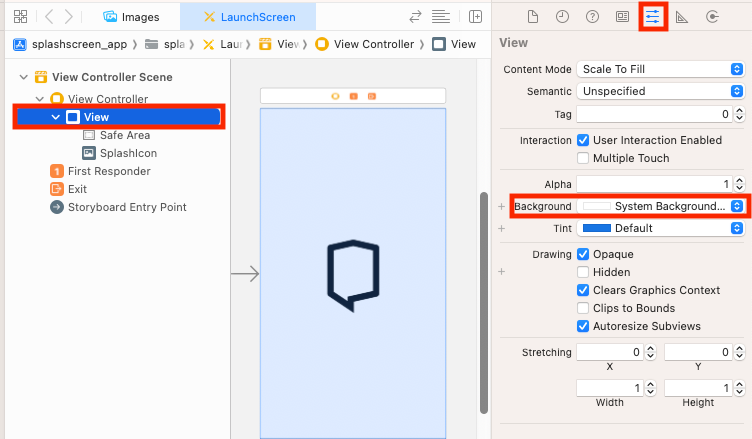
You can also set the Content Mode to center, so that the Icon is centered in its square (square dots around the icon):
One more thing, you can also change the background color. But if you do, the color you chose will always be displayed, no matter what the system theme is.
If you don't need the background color to match the system theme, you can then select the View, and change the background color in the right drawer:
You're all set! Last step is to build again, and you should be able to see your new splash screen when you open the app:
Splash screen result on iOS app
Here, we stayed simple by using an image, the purpose was to show you the process.
Keep in mind though that even if there is no limitation on the duration of the splash screen (in the case of an animation for example) the splash screen is meant to be displayed only while your app is charging. The goal of every app is for the user to access it, so keep it simple!