How to add a Custom App Icon to your React Native Mobile App (iOS & Android)

The article assumes you already have a React Native app in progress and are looking for more information on how to specifically add an app icon. Should you still be missing the base structure of your project, feel free to check out our open source React Native Template on GitLab. Find instructions on how to use it, in the README under “Usage”. We are also always grateful for any contributions and feedback!
We will start off with a small introduction to what an app icon is and what should be taken into consideration when creating it. If you want to jump straight into the step-by-step instructions on how to add it, feel free to skip right to How Tos for iOS and Android.
But let’s get started with the actual topic at hand.
App Icon Basics
What is an App Icon - An app icon is a small graphic asset which represents an app. It is what users will be seeing and looking for on their devices when searching for your app. Let’s take a quick look at why app icons are a must have and some best practices that can be taken into consideration in general.
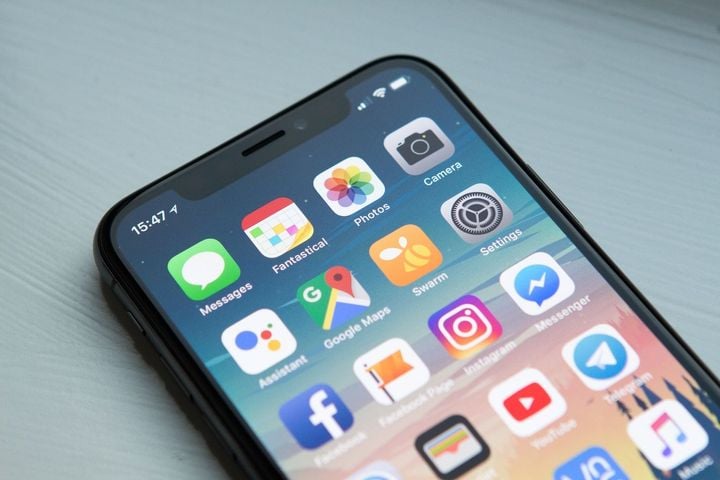
Why is it a must have - The app icon is potentially the first contact users will have with your product. Maybe they have already come across it via an ad or received a recommendation for your product, but when browsing through the app store, this is the first thing they will put their eyes on. Also, after downloading your app, it is what users will be skimming for while swiping through their device’s home screen. Hence, you want your app icon to be distinctive and noticeable.
I, for example, have way too many apps with similar colors and logos on my phone. When unfocused, I constantly find myself opening and closing multiple apps before starting the one I’ve been actually aiming for - tedious. However, this does not mean you should be going for an app icon “screaming” at users. Let’s take a look at some of the basic best practices.
What best practices are there - Despite me writing about your app icon being an eye catcher in the above paragraph, the trend has been moving towards simplicity and minimalisitic design over the past couple of years.
Apple puts specific emphasis on simplicity. A “simple” design makes it easier for users to get a quick impression on what your app is about and also improves its compatibility across different platforms. Meaning, while your app icon should “embrace simplicity”, you want its existing features to make it distinctive and recognisable. The biggest do’s and don’ts are as follows:
Do’s
- Keep it simple
- Make it square - most platforms will automatically transform the icon into their preferred form.
- Provide it in the right sizes - more about this in detail later
- Make it unique and relevant to your brand
Don’ts
- Avoid using photos, screenshots or plain text
- Your app icon CAN be in relation to your brand’s logo, but it does not have to be
If you want to dive further into the subject of app icon design, check out this article on how to design an app icon.
Add your App Icon on iOS
Requirements
- iOS project
- Xcode
- 1024x1024 px image asset
Depending on the Xcode version you are using, there might be some UI differences. The version used here is Xcode 14.2.
How To
- Start Xcode and open the iOS folder of your project. If this is the first time you are loading it into Xcode, this might take a moment.
- Once your project is marked as Ready, navigate all the way through until you get to Images.
MyProjectbeing the name of mine, replace this with your project’s name
MyProject > MyProject > Images
Here, there should already be an item calledAppIcon. - When selecting
AppIcon, you should be presented with the different size options, iOS expects your app icon potentially being used in. Lucky for us, the default nowadays is single size and we need our asset only in 1024x1024 px. - Change “All Sizes” on the right side of Xcode to “Single Size” and drag your image asset into the field.
- Run a build of your project and you should already have your app icon in place.
- Commit and push your changes. That’s it for iOS. Congratulations to your new app icon.
Add Your App Icon on Android
Requirements
- Android project
- Android Studio
- Image asset
How To
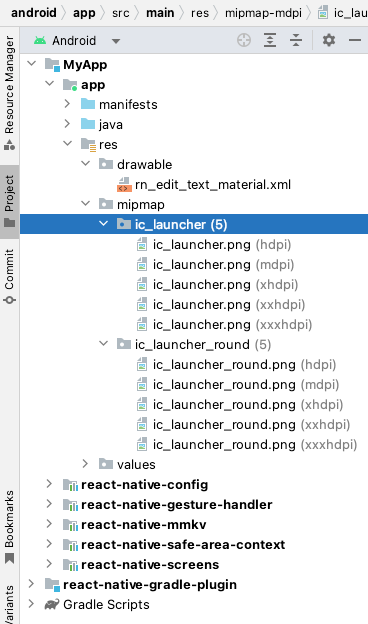
- Launch Android Studio, and open the android folder of your project.
On the left in Android Studio you will find the Project window with the structure of your files. - Your current icons can be found in app > src > main > res. The multiple images correspond to the diverse icons quality to match different screens.
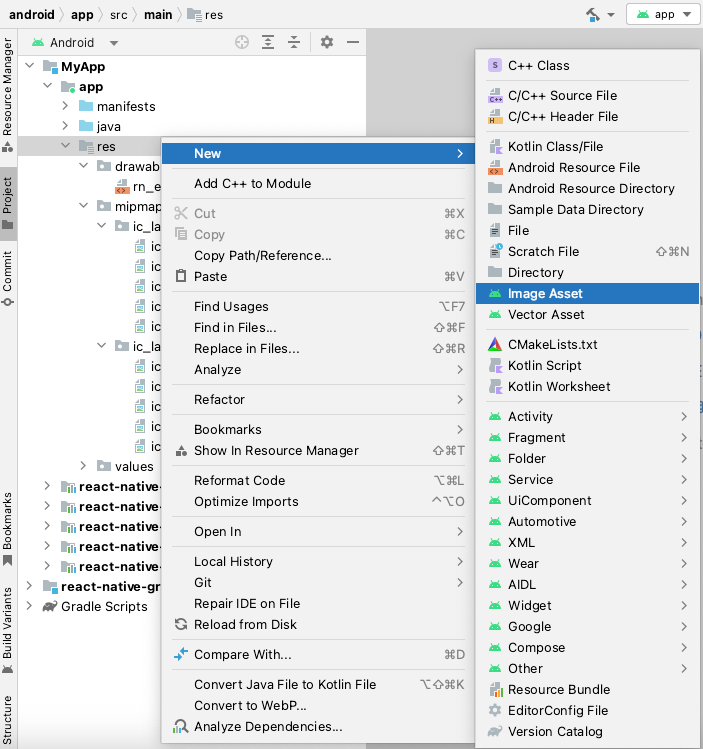
- In order to change the icon, right click on the res repository and go to New > Image Asset. This will open the Image Asset panel.
- In the Image Asset, select the Path of your new icon in the Source Asset section. Your logo will replace the default one.
The content of your Icon might appear too small or too big. You can use the Resize bar in the Scaling section to ensure that everything appears in the safe zone for each layer.
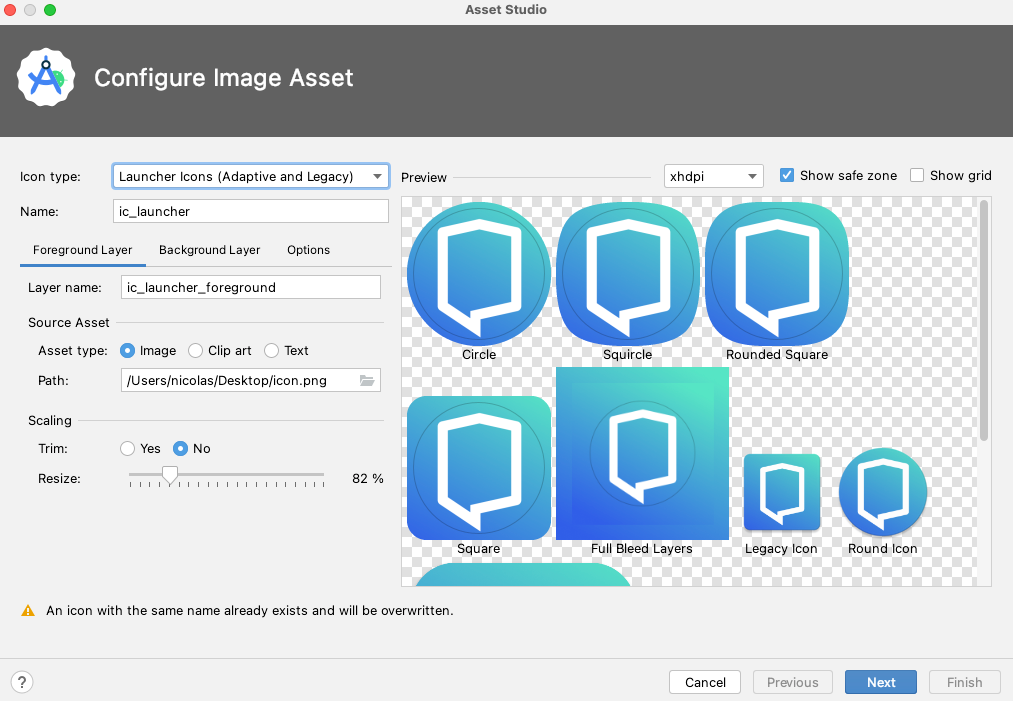
You can also use an image for the background layer or define a color. Background layer and foreground layer can move independently, so having them both can result in an interesting effect.
- You can then click on Next to get to the Confirm Icon Path. Here you can click on individual files to preview them.
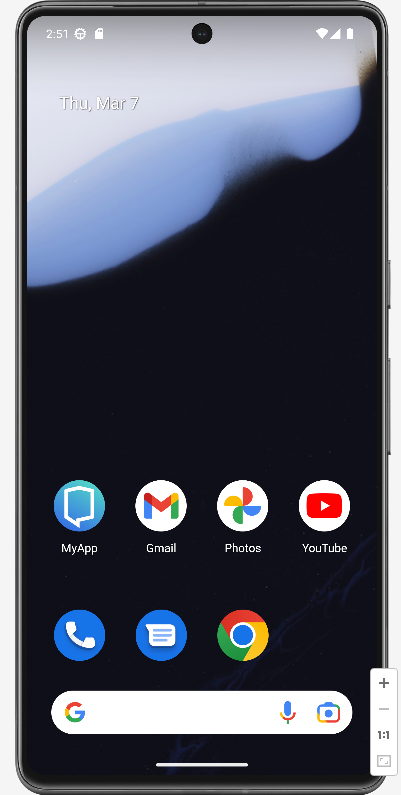
- At this step, you should be all setup! To make sure of it, start your app. You should be able to see your new icon.
Conclusion
The App Icon is an important part of your branding, and it’s important to keep it in line with your application’s design. As you could see, changing an App Icon is a pretty straightforward process. However, it’s important to keep in mind some best practices about App Icon for it to be effective.