Firebase Analytics with React Native: How to track screen views and user interactions

Firebase is a cloud services provider that comes as a toolset to meet your app needs without the struggle of managing a big infrastructure: From cloud messaging to databases and authentication, it's also offering what is considered as the successor of Google Analytics: Firebase Analytics. We will look into how to implement analytics into a React Native application and manage, test and deploy its core features.
Installing Firebase
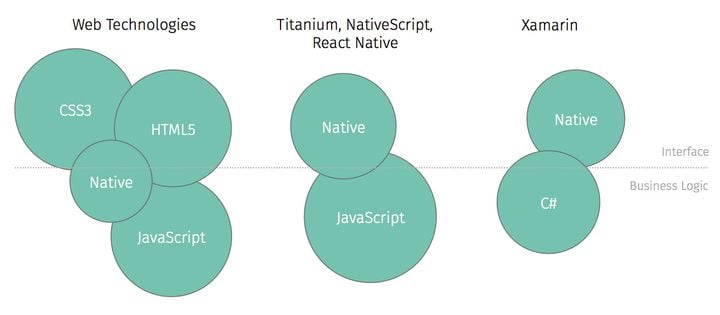
Adding Firebase to your Android or iOS project happens mostly on the native layer of your application. But in order to access and manipulate its features, you will need a bridge that communicates from Javascript to the native Firebase SDK. I would recommend using react-native-firebase for this purpose.
The installation procedure is very well explained on the official website, so we will not dive into it in this article, but rather focus our attention on the implementation of the Javascript layer.
Tracking Screens With React Navigation
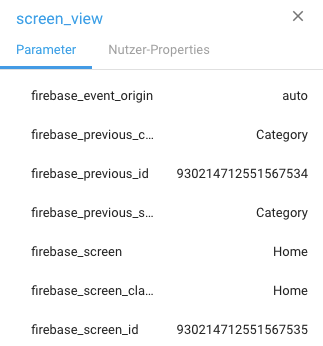
The default screen view event is described like this:
setCurrentScreen(screenName, screenClassOverride)
In our case, we want to automatically track every screen whenever the user navigates from one to another. The best place to hook this event up is with your router. Assuming the use of React Navigation this would be your AppNavigator's onNavigationStateChange event. We need a function to get the active route name, and we also need to make sure we only register a change of screens, as onNavigationStateChange will also be triggered when using onNavigationFocus for example.
Using the navigation state, we can retrieve the current route by using this recursive helper function:
 getActiveRouteName(navigationState: NavigationState) {
    if (!navigationState) {
      return null;
    }
    const route = navigationState.routes[navigationState.index];
    // Dive into nested navigators
    if (route.routes) {
      return this.getActiveRouteName(route);
    }
    return route.routeName;
  }
Let's apply it to onNavigationStateChange on our AppNavigator component and track the current route:
<AppNavigator
    onNavigationStateChange={(prevState, currentState) => {
        const currentScreen = this.getActiveRouteName(currentState);
        const prevScreen = this.getActiveRouteName(prevState);
        if (prevScreen !== currentScreen) {
            firebase.analytics().setCurrentScreen(currentScreen);
        }
    }}
/>
If you are using react-navigation in conjunction with Redux (practice which is being deprecated, by the way), the same method can be applied inside your navigate action.
That's about it! From now on, every time the user navigates to a new screen, the event will be registered and sent to the Firebase service.
Tracking Actions With Higher Order Components
Depending on your needs and the data you'd like to gather, tracking user actions can be as valuable as tracking the screens the user is going through. Let's pretend we have a few Button components that are used all around the app. We can create a HOC that we will encapsulate these components and track every unique onPress event. We can pass event names and parameters to the HOC to help identify them.
const withTracking = (WrappedComponent) => (props) => {
  const { onPress, event, eventParams, ...otherProps } = props;
  return (
    <WrappedComponent
      {...otherProps}
      onPress={() => {
        if (event) {
          firebase.analytics().logEvent(event, eventParams);
        }
        props.onPress();
      }}
    />
  );
};
We can note how the withTracking HOC can only be applied to Touchable components, in other words components that have an onPress property.
Applying it to our Button component, we end up with:
export default withTracking(Button);
Later on, we can leverage the HOC's event handling every time we use our custom Button component.
<Button
	onPress={() => this.onPress()}
	event={'continue'}
	eventParams={{ someParameter: this.state.someParameter }}
/>
Debugging
Generally, events logged by your app are batched together over the period of approximately one hour and uploaded together. To help with troubleshooting, you can enable debug mode on your device, it will tell firebase to dispatch events with a minimal delay. You can then monitor them inside the DebugView window in the Firebase console.
On Android, simply execute the following command:
adb shell setprop debug.firebase.analytics.app <package_name>
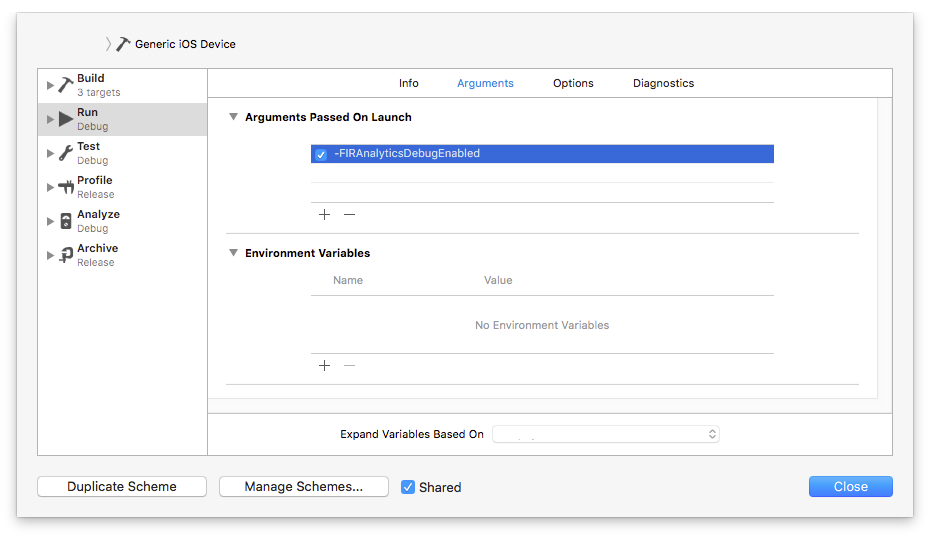
On iOS, open Xcode and go to Product -> Scheme -> Edit Scheme. Add the following argument to 'Arguments Passed On Launch' in the Run -> Arguments section.
-FIRAnalyticsDebugEnabled
Note that this will only ever work when running the app in Debug mode. Production builds will always use the regular event dispatching system.
Wrapping Up
Using a very well documented native SDK and light Javascript layer, you now have the ability to track every screen and action of your choice that will help you understand how people use your iOS or Android app. Analytics is a powerful feature that integrates well with a lot of other features, opening up a lot of use cases and opportunities in just a few installation and refactoring steps.
If you want to read more about development with React Native, check out this blog post for an introduction to automating RN builds with GitLab Ci: continuous integration react native or this blog post about FormatJS in React Native.