Automate React Native Builds With GitLab CI: Walkthrough and Tutorial

Besides powerful version control and project management, the GitLab ecosystem also integrates tools such as GitLab CI, that allows developers to streamline and optimize the testing and deployment stages of your app development lifecycle.
In this article we will tackle the steps needed to implement continuous integration to your React Native apps in GitLab, and help you maintain momentum in your team by offering constant availability of your builds for testing, demo and release purposes.
There are only 2 steps needed to have a working CI system:
- Set up a Runner
- Add a .gitlab-ci.yml file to your project
Set up a Runner
Essentially, a Runner will be used to run your jobs in any kind of environment you install it onto, and send the results back to GitLab. It can run your jobs encapsulated in a docker image or simply in the shell of a targeted machine. For our React Native needs, the Runner needs to be executed in an environment hosting Android SDKs, Xcode and Node. For this specific article, we will be installing our Runner on a macOS machine.
Once the environment is ready, simply install GitLab Runner, register it with the token provided by GitLab and run the daemon. You can set up a tag to uniquely identify the runner that help you target this specific environment in your YAML file. Let's pretend we use the tag rnbuild.
Configure .gitlab-ci.yml
Jobs within a CI configuration can belong to three different default stages : build, test and deploy. In order to keep this article focused, we will only pay attention to the deploy stage, and work our script around that. The CI script uses the YAML markup language, make sure you get familiar with the syntax before diving head on in the code.
Building on Android or iOS will require different steps, so let's define a job for each. To keep it simple, we can start with Android.
Automating the Android build
First things first, we need to find a way to pass our password for the keystore, in order to get a digitally signed build. You generally don't want to push that to your repository. GitLab explicitely offers variables that you can pass to your runners. Let's define a variable for the password and call it KEYSTORE_PASSWORD.

Let's now look into the YAML script. We need to tell the gitlab runner to install our npm packages before running anything else. Let's use the anchor before_script.
deploy:android:
	stage: deploy
	tags:
		- rnbuild
	before_script:
		- npm install
We then apply the usual build commands and use environment variables to pass our keystore password to the build script.
script:
	- cd android && ./gradlew assembleRelease -PMYAPP_RELEASE_STORE_PASSWORD=$KEYSTORE_PASSWORD -PMYAPP_RELEASE_KEY_PASSWORD=$KEYSTORE_PASSWORD
Once the runner will create the build, we need to find it within the android folder and upload it back to GitLab. We use the artifacts anchor for this end purpose. We can use a combination of variables given by the runner such as $CI_PROJECT_NAME and $CI_COMMIT_REF_NAME to name our build file.
    - cp android/app/build/outputs/apk/app-release.apk $CI_PROJECT_NAME-$CI_COMMIT_REF_NAME.apk
    artifacts:
        name: "$CI_PROJECT_NAME-$PLATFORM-$CI_COMMIT_REF_NAME"
        paths:
            - $CI_PROJECT_NAME-$CI_COMMIT_REF_NAME.apk
        expire_in: 7 days
That's all it takes. Specifying when: manual will help you optimize ressources if that's a concern, so your build machine will only work when needed by the team.
deploy:android:
	stage: deploy
	tags:
		- rnbuild
	before_script:
		- npm install
	script:
		- cd android && ./gradlew assembleRelease -PMYAPP_RELEASE_STORE_PASSWORD=$KEYSTORE_PASSWORD -PMYAPP_RELEASE_KEY_PASSWORD=$KEYSTORE_PASSWORD
    	- cp android/app/build/outputs/apk/app-release.apk $CI_PROJECT_NAME-$CI_COMMIT_REF_NAME.apk
    artifacts:
        name: "$CI_PROJECT_NAME-$PLATFORM-$CI_COMMIT_REF_NAME"
        paths:
            - $CI_PROJECT_NAME-$CI_COMMIT_REF_NAME.apk
        expire_in: 7 days
	when: manual
Automating the iOS build
Xcode comes with the xcodebuild CLI, a command line tool that essentially will help you archive and build your app.
For the sake of simplicity, we set up a machine to automatically manage signings by logging in to the relevant accounts on Xcode. But you could use tools like Fastlane to help you manage codesigning and use the right provisioning profiles for your project. The relevant provisioning profile can be specified in Info.plist under PROVISIONING_PROFILE, or added as a variable to the xcodebuild command.
Once that is set up, you can start writing the YAML script. Most of it is very similar to the Android script, except 2 key-steps. What we will do instead of the gradlew command is essentially build an archive with xcodebuild archive, and then create the .ipa with xcodebuild -exportArchive.
    - xcodebuild -scheme $PACKAGE_NAME archive -archivePath $PACKAGE_NAME.xcarchive -allowProvisioningUpdates
    - xcodebuild -exportArchive -archivePath ./$PACKAGE_NAME.xcarchive -exportPath . -exportOptionsPlist $PACKAGE_NAME/Info.plist
This is what the final iOS script looks like:
deploy:ios:
	stage: deploy
	tags:
		- rnbuild
	before_script:
		- npm install
	script:
    - export PACKAGE_NAME=$(node -p -e "require('./package.json').name")
    - cd ios
    - xcodebuild -scheme $PACKAGE_NAME archive -archivePath $PACKAGE_NAME.xcarchive -allowProvisioningUpdates
    - xcodebuild -exportArchive -archivePath ./$PACKAGE_NAME.xcarchive -exportPath . -exportOptionsPlist $PACKAGE_NAME/Info.plist
    - mv $PACKAGE_NAME.ipa ../$PACKAGE_NAME.ipa
Note how we get the package_name to access the relevant scheme and workspace name.
Consolidation
To avoid redundancy and keep things easily scalable, we can also consolidate our scripts into a template, this is what our final code will look like.
.job_template: &job_deploy
  stage: deploy
  before_script:
    - npm install
  tags:
    - rnbuild
  after_script:
    - cp $OUTPUT_PATH.$FILE_TYPE $CI_PROJECT_NAME-$CI_COMMIT_REF_NAME.$FILE_TYPE
  artifacts:
    name: "$CI_PROJECT_NAME-$PLATFORM-$CI_COMMIT_REF_NAME"
    paths:
    - $CI_PROJECT_NAME-$CI_COMMIT_REF_NAME.$FILE_TYPE
    expire_in: 7 days
  when: manual

deploy:android:prod:
  variables:
    PLATFORM: android
    FILE_TYPE: apk
    OUTPUT_PATH: android/app/build/outputs/apk/app-release
  <<: *job_deploy
  script:
    - cd android && ./gradlew assembleRelease -PMYAPP_RELEASE_STORE_PASSWORD=$KEYSTORE_PASSWORD -PMYAPP_RELEASE_KEY_PASSWORD=$KEYSTORE_PASSWORD

deploy:ios:prod:
  variables:
    PLATFORM: ios
    FILE_TYPE: ipa
    OUTPUT_PATH: ./$CI_PROJECT_NAME
  <<: *job_deploy
  script:
    - export PACKAGE_NAME=$(node -p -e "require('./package.json').name")
    - cd ios
    - xcodebuild -scheme $PACKAGE_NAME archive -archivePath $PACKAGE_NAME.xcarchive -allowProvisioningUpdates
    - xcodebuild -exportArchive -archivePath ./$PACKAGE_NAME.xcarchive -exportPath . -exportOptionsPlist $PACKAGE_NAME/Info.plist
    - mv $PACKAGE_NAME.ipa ../$PACKAGE_NAME.ipa
From then on, it's easy to add features that will be applied to both platforms. Want to hook up your Slack bot? Piece of cake!
- "curl -X POST -H 'Content-type: application/json' --data ' ''{\"text\":\"🚀 '${CI_PROJECT_NAME}' '${PLATFORM}' *'${CI_COMMIT_REF_NAME}'* is now available for download: <https://gitlab.com/hybridheroes/physiofit/-/jobs/'${CI_JOB_ID}'/artifacts/download>\" }'' ' ${SLACK_HOOK}"
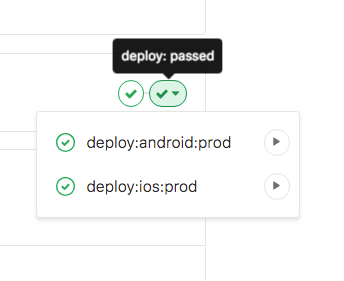
Simply trigger the build process from the GitLab interface to have your files delivered directly to the GitLab server.

Wrapping Up
Manually building your branches on devices and simulators with React Native can sometimes take a tremendous amount of time, especially when different developers work on the same project, or when a non-technical QA has to go through the process every time.
Automating builds is the best and surefire way to provide a constant delivery of your software builds and will help you optimize turnaround times and focus more on what matters in your own React Native development lifecycle. Happy continuous integration!
If you want to read more about development with React Native, check out this blog post about Firebase Analytics with React Native or this blog post about FormatJS in React Native.


